Spider Bite Piercing: The Ultimate Guide for 2025
Spider bite piercings have taken the body modification world by storm in 2025, emerging as one of the most sought-after lip piercing styles. These distinctive double piercings create an edgy, eye-catching look that’s captured the imagination of piercing enthusiasts worldwide.
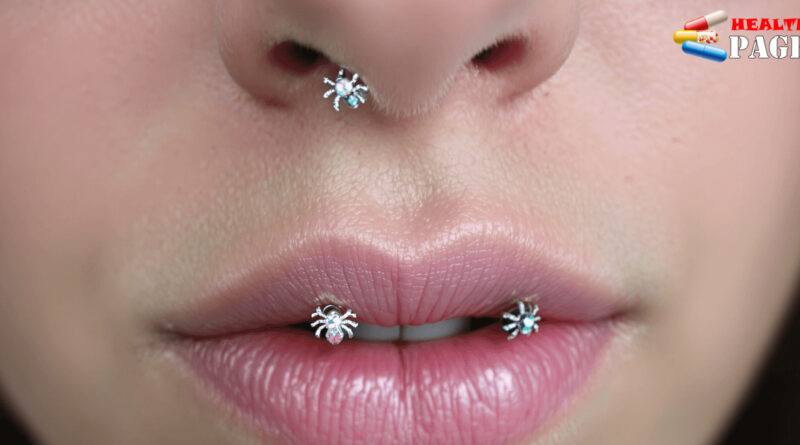
The name “spider bite” comes from the piercing’s unique appearance – two small holes placed close together near the corner of the lower lip, mimicking the marks left by an actual spider bite. This aesthetic choice offers a perfect blend of subtlety and boldness, making it a favorite among those seeking to express their individuality.
This comprehensive guide walks you through:
- The exact piercing procedure
- Real costs in 2025
- Potential risks and complications
- Essential aftercare practices
- Expected healing timeline
- Effects on dental health
- Latest jewelry trends and options
- Tips for selecting qualified piercers
Whether you’re considering your first lip piercing or adding to your collection, understanding these aspects helps ensure a safe, successful experience. The rising popularity of spider bite piercings has brought innovations in jewelry design and piercing techniques, making 2025 an exciting time to explore this distinctive style.
Remember: choosing the right professional piercer and following proper aftercare instructions are crucial steps in your spider bite piercing journey.
What Is a Spider Bite Piercing?
A spider bite piercing features two distinct holes placed close together near the corner of your lower lip. These piercings sit approximately 1/8 to 1/4 inch apart, creating a unique appearance that sets them apart from traditional single lip piercings.
The name “spider bite” comes from the piercing’s visual similarity to actual spider bite marks. Just as venomous spiders often leave two puncture wounds when they bite, these paired piercings create a similar pattern on your lip.
Why Choose Spider Bite Piercings?
Spider bite piercings stand out in the world of body modification through their:
- Symmetrical Design: The two piercings align perfectly to create a balanced look
- Customizable Spacing: You can adjust the distance between piercings based on your preferences
- Versatile Styling: Each hole can showcase different jewelry types and colors
For instance, you could opt for something like the ABC Symmetric Lightweight Piercing Jewelry which perfectly complements the symmetrical design of spider bite piercings.
Placement Options for Spider Bite Piercings
The placement options include:
- Traditional corner placement
- Centered under the lower lip
- Slightly offset from center
- Diagonal arrangement
This piercing style has gained popularity for its subtle yet striking appearance. Unlike larger lip modifications, spider bites offer a delicate aesthetic that complements various facial features. The dual-piercing design allows for creative jewelry combinations, making it a favorite among those seeking a distinctive look without overwhelming their natural features.
Many people choose spider bite piercings to express their personality through body art while maintaining a professional appearance when needed. The piercings can be styled with minimal jewelry for subtle elegance or bold pieces for dramatic impact.
The Spider Bite Piercing Procedure
A professional spider bite piercing follows strict safety protocols to ensure the best results. Here’s what happens during your appointment:
Pre-Piercing Preparation
- Your piercer will wash their hands thoroughly and put on fresh disposable gloves
- The lip area gets cleaned with an antimicrobial solution
- You’ll rinse with an alcohol-free antibacterial mouthwash
Sterilization Process
- All needles come in sealed, sterile packaging
- Jewelry is sterilized in an autoclave at high temperatures
- Fresh sterilized tools are used for each client
Marking and Placement
- Your piercer will mark two dots near your lower lip corner
- The marks are placed approximately 1/8 inch apart
- You’ll check the placement in a mirror to ensure satisfaction
- Adjustments are made until the positioning looks perfect
The Piercing Steps
- A clamp holds your lip steady
- The first hole is pierced with a hollow needle
- Initial jewelry is inserted immediately
- Process repeats for the second hole
- Both piercings receive a final cleaning
Professional Tips
- Eat before your appointment to avoid low blood sugar
- Wear comfortable clothing that won’t brush against your new piercing
- Choose an experienced piercer who specializes in oral piercings
- Ask to see examples of their previous spider bite work
The entire procedure typically takes 15-20 minutes, with most time spent on proper marking and sterilization rather than the actual piercing.
Pain Levels and What to Expect During the Process
The pain from a spider bite piercing can be different for everyone, but most people say it feels like a sharp pinch followed by a burning sensation. On a scale of 1-10, clients usually rate the pain between 5-7. This means it’s more painful than earlobe piercings but less painful than septum or industrial piercings.
“The first piercing felt like a quick bee sting. The second one hurt a bit more because the area was already sensitive” – Sarah, 24, who got her spider bites in early 2025.
Understanding the Pain Sequence
Here’s what you can expect in terms of pain after getting a spider bite piercing:
- Initial sharp pinch: You’ll feel a quick, sharp pain when the needle goes in.
- Burning sensation: For the next 2-3 minutes, there will be a burning feeling around the piercing area.
- Throbbing discomfort: After that, you may experience a dull throbbing pain for several hours.
- Mild tenderness: Over the next 3-5 days, the area might feel tender to touch.
Tips to Manage Pain
Here are some tips to help you manage the pain during and after the procedure:
- Take deep breaths during the procedure
- Eat a light meal beforehand to prevent feeling lightheaded
- Apply ice packs (wrapped in cloth) to reduce swelling
- Use over-the-counter pain relievers if needed
- Avoid touching or playing with the jewelry
Getting Both Piercings Done at Once
Many piercers recommend getting both spider bite piercings done in the same session while your adrenaline is still high. This way, you’ll have less time to think about the pain and it will be over quickly. The second piercing might hurt more because the area is already sensitive, but don’t worry – it won’t last long!
Swelling After Piercing
The lip has a lot of blood vessels, so you might notice more swelling right after getting your spider bites compared to other facial piercings. Usually, this swelling reaches its peak within 48 hours and then gradually goes down over the next week.
Cost of Spider Bite Piercings in 2025
Spider bite piercing costs vary significantly across different locations and studios. The typical price range falls between $20-$80, with several factors influencing the final cost:
1. Base Piercing Fee: $20-$35
This fee covers the basic costs associated with the piercing procedure, including:
- Basic sterilization
- Professional expertise
- Studio overhead costs
2. Jewelry Costs: $15-$45
The cost of jewelry can vary depending on the materials used and any custom designs. Here are some examples of potential jewelry costs:
- Surgical steel options: $15-$25
- Premium titanium pieces: $30-$45
- Custom designs: $40+
3. Location Impact on Pricing
The location of the studio can also impact the pricing of spider bite piercings. Generally, urban areas tend to have higher prices compared to rural locations. Additionally, premium studios in major cities may charge more than $80 for their services.

4. Studio Reputation Factors
The reputation of the studio can play a role in determining the cost of piercings as well. Factors such as years of experience, portfolio quality, health and safety certifications, and client reviews can all influence pricing.
Choosing a professional piercer based solely on lower prices can lead to complications. Professional studios maintain strict health standards, use high-quality materials, and provide comprehensive aftercare guidance. These safety measures justify higher costs compared to budget alternatives.
A reputable studio’s pricing includes:
- Sterile equipment
- High-grade jewelry
- Experienced staff
- Clean facilities
- Aftercare instructions
- Follow-up consultations
The initial investment in a quality spider bite piercing reduces the risk of infections, complications, and the need for costly corrections later. When selecting a piercer, prioritize expertise and safety standards over bargain prices.
Common Side Effects and Risks to Know About Before Getting a Spider Bite Piercing
Understanding potential risks helps you make an informed decision about spider bite piercings. Here are the key complications to consider:
1. Allergic Reactions
- Redness, itching, or swelling around piercing sites
- Skin irritation from nickel-containing jewelry
- Burning sensation or rash development
- Switch to hypoallergenic materials like titanium if symptoms occur
2. Physical Complications
- Tearing risks from catching jewelry on clothing or during eating
- Dental damage from jewelry hitting against teeth
- Gum recession near piercing sites
- Embedding issues when initial jewelry is too small for swelling
3. Tissue Problems
- Migration – piercings slowly moving from original position
- Rejection – body pushing jewelry out through skin
- Keloid formation – raised scars developing around piercing sites
- People prone to keloid scarring should avoid this piercing type
4. Infection Risks
Piercings come with their own set of infection risks, particularly if proper care is not taken. This includes bacterial infections that may arise from improper sterilization of the equipment used. Symptoms of an infection can be severe and include:
- Excessive swelling
- Unusual discharge
- Persistent pain
- Warm-to-touch skin
The risk of infection increases with certain behaviors such as touching piercings with unwashed hands, poor oral hygiene, or using unsterilized equipment. For more information on how to prevent tattoo-related infections, which share similar risks with piercings, refer to this article from the Cleveland Clinic on tattoo infections.
5. Long-term Considerations
It’s important to note that spider bite piercings can lead to permanent scarring and might even alter speech patterns during the healing process. Furthermore, if the piercing is done incorrectly, it could result in potential nerve damage and impact future professional opportunities.
However, these risks can be significantly reduced by conducting thorough research and choosing an experienced piercer. Always verify your piercer’s credentials and the studio’s sterilization practices before proceeding with the piercing.
For a comprehensive understanding of body piercings including spider bite piercings, you may find this resource by Mayo Clinic helpful: Mayo Clinic on Piercings.
Essential Aftercare Tips for Spider Bite Piercings
Proper aftercare makes the difference between a successful piercing and potential complications. Here’s your comprehensive guide to caring for your spider bite piercings:
Daily Cleaning Routine
- Rinse with alcohol-free mouthwash 3-4 times daily
- Use a saline solution to clean the external area
- Avoid touching the piercing with unwashed hands
- Clean after meals to prevent food particles from getting trapped
Oral Care Adjustments
- Switch to gentle, SLS-free toothpaste
- Use a new, soft-bristled toothbrush
- Brush carefully around the piercing area
- Maintain regular dental hygiene without disturbing the jewelry, as oral piercings can have specific dental considerations
Diet Modifications
- Stick to soft foods for the first week
- Cut food into smaller pieces
- Avoid spicy, acidic, or hot temperature foods
- Stay hydrated to support healing
Lifestyle Adaptations
- Sleep on your back to prevent pressure on the piercing
- Change pillowcases every 2-3 days
- Avoid smoking and alcohol during initial healing
- Skip makeup around the mouth area
Red Flags to Watch
- Excessive swelling beyond the first few days
- Yellow or green discharge
- Persistent redness or warmth
- Severe pain or throbbing sensation
- Jewelry feeling too tight or embedded
Keep the jewelry in place during the entire healing period. Removing or changing jewelry too early can lead to closure or complications. If you notice any concerning symptoms, contact your piercer or healthcare provider immediately.
Healing Time Frame Explained
Spider bite piercings take between 4-12 weeks to heal completely. The exact duration varies from person to person based on several factors:
Factors Affecting Healing Speed:
- Individual healing ability – Some people naturally heal faster than others
- Immune system strength – A robust immune system speeds up recovery
- Age – Younger individuals often heal more quickly
- Smoking habits – Smoking can significantly delay healing
- Diet and nutrition – A balanced diet rich in vitamins C and D supports faster healing
- Sleep quality – Good sleep promotes tissue repair
- Stress levels – High stress can slow down healing
Signs of Proper Healing:
- Decreased swelling around piercing site
- Reduced tenderness when touching the area
- Clear fluid discharge that gradually decreases
- Formation of new, healthy tissue
Your healing timeline can be shortened through dedicated aftercare practices. Following your piercer’s cleaning instructions, avoiding alcohol consumption, and maintaining good oral hygiene directly impact recovery speed.
Certain activities can extend your healing period:
- Playing with or rotating jewelry
- Frequent touching of the piercing
- Exposure to pool water or hot tubs
- Using tobacco products
- Consuming spicy or acidic foods
- Engaging in oral contact
A properly healed spider bite piercing should feel comfortable with no pain, swelling, or discharge. The tissue around the piercing should appear similar in color to surrounding areas, with two clean, well-defined holes that don’t move or shift position.
Impact on Oral Health and How to Minimize It
Spider bite piercings can significantly affect your dental health. The constant contact between metal jewelry and your teeth creates a risk of dental complications that shouldn’t be ignored.
Common Oral Health Issues:
- Tooth enamel erosion from jewelry movement
- Gum tissue damage and recession
- Chipped or cracked teeth
- Increased plaque buildup around piercing sites
- Higher risk of bacterial infections
Your gums are particularly vulnerable to damage from spider bite jewelry. The constant rubbing can lead to gum recession – a condition where gum tissue pulls away from teeth, exposing sensitive root surfaces. This damage often occurs gradually and might go unnoticed until significant recession has occurred.
Preventive Measures for Protecting Your Oral Health:
- Schedule dental check-ups every 3-4 months instead of the standard 6 months
- Choose smaller, flat-backed jewelry to minimize contact with teeth
- Switch to bio-compatible materials like titanium if irritation occurs
- Remove jewelry during sleep to reduce nighttime damage
- Use an alcohol-free antimicrobial mouthwash
Signs of Oral Health Problems:
- Sensitivity to hot and cold
- Visible gum recession
- Tooth pain or discomfort
- Loose jewelry that moves excessively
- Clicking sounds when jewelry hits teeth
Professional piercers recommend starting with longer bars during initial healing, then switching to shorter ones that fit more snugly against your lip. This adjustment helps reduce movement and potential damage to your teeth and gums while maintaining the aesthetic appeal of your spider bite piercing.
Remember to pay attention to how your jewelry interacts with your mouth during daily activities like eating and speaking. If you notice any unusual sensations or discomfort, consult your piercer or dentist promptly.
Popular Jewelry Options for Spider Bite Piercings
Spider bite piercings offer exciting possibilities for self-expression through various jewelry styles. Here’s a detailed look at the most popular options:
1. Flat Disc Labret Studs
- Features a flat disc that sits flush against the inner lip
- Available with different bead ends for customization
- Ideal for initial healing due to reduced movement
- Perfect for professional settings where subtle jewelry is preferred
2. Hoops and Rings
- Classic circular hoops in different diameters
- Seamless rings for a sleek appearance
- Clicker rings with easy-to-use hinged closure
- Segment rings that allow for quick jewelry changes
3. Captive Bead Rings (CBRs)
- Traditional style with a removable decorative bead
- Available in multiple gauge sizes
- Offers secure wear with proper installation
- Can be customized with different bead designs
4. Circular and Twister Barbells
- Horseshoe-shaped pieces with decorative ends
- Spiral designs for unique visual appeal
- Multiple length options to accommodate swelling
- Mix-and-match end pieces for personalization
5. Materials and Finishes
- Surgical Steel: Affordable, durable, and nickel-tested
- Titanium: Lightweight, biocompatible, and hypoallergenic
- Gold: Available in 14k and 18k options for luxury appeal
- Anodized Finishes: Rainbow, oil slick, and metallic colors
- PVD Coating: Black, rose gold, and other fashion-forward options
The current trend favors minimalist designs in high-quality materials, with anodized titanium pieces gaining popularity for their unique color options and safety profile. Many piercers stock interchangeable pieces that allow you to mix and match different components for a personalized look.
Choosing the Right Professional Piercer
Selecting a qualified piercer makes the difference between a safe, successful spider bite piercing and potential complications. Your research should start with reading client reviews and examining before-and-after photos of their work.
What to Look for in a Piercing Studio
A reputable piercing studio will:
- Display current health department certifications
- Maintain a clean, organized workspace
- Use an autoclave for sterilizing equipment
- Provide detailed aftercare instructions
- Welcome questions about their experience and procedures
What to Avoid in a Piercing Studio
Red flags to watch for:
- Reluctance to show sterilization practices
- Lack of proper certifications
- Using piercing guns instead of needles
- Pushy sales tactics for jewelry upgrades
Questions to Ask During Your Consultation
During your consultation, ask these essential questions:
- How many spider bite piercings have you performed?
- What sterilization methods do you use?
- Can you show me examples of healed spider bite piercings?
- What type of jewelry do you recommend for initial piercing?
A professional piercer should take time to discuss placement options and help you choose appropriate jewelry size based on your lip anatomy. They’ll explain the entire procedure and potential risks before starting.
Pro tip: Visit the studio during regular business hours to observe their cleanliness standards and professional conduct. A quality piercer maintains strict hygiene protocols – wearing fresh gloves, using single-use needles, and working in a designated clean space.
The best piercers belong to professional organizations like the Association of Professional Piercers (APP) and regularly attend industry training sessions to stay updated on safety standards and techniques.
Is a Spider Bite Piercing Right for You?
Deciding to get a spider bite piercing involves careful consideration of your personal style and lifestyle factors. These piercings have a unique look that sets them apart from traditional single lip piercings.
Key Benefits:
- Creates a unique, edgy appearance
- Heals relatively quickly (4-12 weeks)
- Offers versatile jewelry options
- Can be removed with minimal scarring
- Makes a bold fashion statement
Important Considerations:
- Regular cleaning and maintenance required
- Temporary speech adjustments during healing
- Potential impact on kissing and eating
- May affect professional settings
- Initial swelling and discomfort
Your lifestyle plays a crucial role in determining if spider bite piercings suit you. Active sports participants should consider the risk of jewelry catching or impact injuries. Food service workers might need to check workplace policies regarding facial piercings.
Professional piercers can assess your lip anatomy and determine the best placement for your facial structure. They’ll evaluate factors like:
- Lip thickness
- Nerve placement
- Dental alignment
- Previous scarring
- Skin sensitivity
Book a consultation with an experienced piercer to discuss your specific situation. They can address individual concerns and help you make an informed decision based on your unique circumstances.
FAQs About Spider Bite Piercings
Can anyone get a spider bite piercing?
While spider bite piercings are popular, they’re not suitable for everyone. People with a history of keloid scarring, blood clotting disorders, or autoimmune conditions should avoid this piercing. Your piercer will evaluate your lip anatomy to ensure it’s compatible with the piercing style.
What happens if my piercing gets infected?
Signs of infection include:
- Excessive swelling
- Unusual colored discharge
- Intense pain or burning sensation
- Fever
Contact your piercer immediately if you notice these symptoms. Severe infections require medical attention – don’t remove the jewelry unless instructed by a healthcare professional.
How often should I clean my new spider bite piercings?
Clean your piercings 2-3 times daily with a saline solution. After meals, rinse with alcohol-free mouthwash. Avoid over-cleaning as this can irritate the piercing sites and delay healing.
Can I change my jewelry during healing?
Wait until your piercings are fully healed (4-12 weeks) before changing jewelry. Early jewelry changes risk:
- Introducing bacteria
- Causing trauma to healing tissue
- Triggering migration
- Creating scar tissue
Visit your piercer for the first jewelry change to ensure proper sizing and technique.
FAQs (Frequently Asked Questions)
What is a spider bite piercing and why is it popular in 2025?
A spider bite piercing consists of two closely placed piercings near the corner of the lower lip, mimicking actual spider bites. It has gained popularity in 2025 for its unique visual appeal and style statement among lip piercings.
How is the spider bite piercing procedure performed safely?
The procedure involves preparing and disinfecting the lips, sterilizing needles and jewelry to prevent infection, marking exact insertion points for symmetry, performing the needle piercing and jewelry insertion step-by-step, followed by final disinfection to ensure safety throughout.
What pain levels can I expect during and after getting a spider bite piercing?
Pain from a spider bite piercing is generally moderate and comparable to other common piercings like ears or nose. Many describe it as a quick sharp sensation during the procedure with manageable discomfort afterward. Pain management tips include following aftercare instructions and using recommended soothing methods.
What are the typical costs associated with getting a spider bite piercing in 2025?
Spider bite piercings typically range from $20 to $80 depending on location, jeweler’s expertise, quality of jewelry, and studio reputation. Investing in professional piercers is important for safety reasons despite varying prices.
What are common side effects and risks of spider bite piercings I should be aware of?
Common risks include allergic reactions to nickel or low-quality materials, tearing if jewelry catches on objects, infections from poor aftercare or unsterilized equipment, embedding issues if jewelry size is too small, migration or rejection due to tissue growth, and higher risk for individuals prone to keloid scars.
How should I care for my spider bite piercing during the healing period?
Essential aftercare includes rinsing regularly with gentle mouthwash to prevent infection, avoiding harsh toothpaste by using milder alternatives, eating soft foods to reduce irritation, avoiding sleeping on the pierced side to prevent swelling or displacement, and monitoring for signs of infection such as unusual discharge or swelling.

Pingback: Trojan Delay Spray Benefits for Men's Sexual Health and Wellness